In case anyone is interested:
jhausch.blogspot.com
Seems like it might be easier to do there than here.
We are building the place using the Dow T-mass insulation system in the foundation and SIPs for the walls.
The whole idea behind the design is me trying to be “efficient” -in construction, in design, in energy, etc.
Looking forward to comments (I think)


Replies
This will make it clickable.
http://jhausch.blogspot.com/
BTW, I have east facing clearstory windows in my MBR and really love them.
Thanks
added some updates today showing floorplans
http://jhausch.blogspot.comAdventures in Home BuildingAn online journal covering the preparation and construction of our new home.
Cool.
Any way that you could make those floorplans a bit bigger? even when I open in a new window and expand it, I can't make out any writing. I suppose I could save it to my hard disk and zoom in, but I'm too lazy for that right now.
Did you do all the floor plan in MS Paint? It looks well done to me.
zak
Sorry for the poor resolution -
The plans were originally drawn (by me) the old fashioned way - pencil and paper. The lumberyard I am working with redrew them in CAD. I then had a blueprint place scan and save them as 200DPI PDF's so I could easily send copies to family members.
What you see on the blog site is this: I used the graphical select tool in Adobe Reader to cut out an image on the PDF. I then pasted it into MSPaint. When in MSPaint, I made some slight modifications noted in the blog text - then saved the images as JPEGs so they'd upload to the blog.
If you want to see more detailed plans, email me and I send you the scanned set. 200DPI is not great, but it is easily zoomable and a little more readable.
http://jhausch.blogspot.comAdventures in Home BuildingAn online journal covering the preparation and construction of our new home.
Looking forward to comments (I think)
Har! Har! Har!
I took a quick look. If you can maintain inputting, this would be a great blog to follow through the good, bad and the ugly. Mike Smith is doing this in a thread of his. It would be great to follow this through another thread and design especially from the HO's perspective.
Are you doing the design solo? Where are you getting your inspirations?
I don't know at what level of design developement you are in currently, but I have a question/ comment about the columns at the front of the house. The relationship the two outer columns have with the the bumpout of the second floor is different than the inside columns with the bump out. Side alignments/ overhangs are different. Is this intentional? Seems the 2 middle columns are a bit too close regardless.
Considering alternative designs on paper are so much cheaper and faster than during construction.
No judgements. Just questions and comments.
Frankie
There he goes—one of God's own prototypes—a high powered mutant of some kind never even considered for mass production. Too weird to live and too rare to die.
—Hunter S. Thompson
from Fear And Loathing In Las Vegas
The drawings you see are of my own design and they are the "4th final design" I've come up with ;-) - Each time shrinking and slightly modifying out of budget constraints - but always with an eye toward efficiency of construction and still trying to not have the place look boring.
The look I want is sort of a contemporary craftsman and I did look for existing designs. None of the premade designs I could find in this style/size/price range had a "back end" that was appropriate for a house on a lake.
You know - you make a good point about the inner columns. I did not associate them with the bumpouts when drawing originally - but you are right, they would look better if they lined up. The structural posts in those columns can be moved a bit without modifying the foundation elements they are resting on. I have further "fudgeability" in that the decorative tapered columns can shift a bit if required, too.
The bumpouts are made with cantilevered I-joists and will not gain support from the columns - but lining them up would be better.
Now that's some good and well-presented constructive criticism - thanks.
Don't expect the drawings to change, but check back in about 9 months to see if I remembered to move them . . .
http://jhausch.blogspot.comAdventures in Home BuildingAn online journal covering the preparation and construction of our new home.
"Now that's some good and well-presented constructive criticism - thanks."You sound surprised/ relieved. Ha!Did the lumberyard charge you extra to do the transcribing or is that part of their package? What is the permiting/ stamping criteria where you are? Who stamps the drawings and for how much?I understand the revision process and how tiring it can get. If you make your further alterations - there will be others - the CAD program can disperse the impact of the revision throughout the design, from foundation to roof. You may be able to find someone who has access to the CAD application and wants to do a bit of moonlghting. You will need them for better pricing and easier permitting/ inspections.Telling Subs that design issues will be adressed during construction will raise their rates, a lot, especially from a first time builder.FrankieThere he goes—one of God's own prototypes—a high powered mutant of some kind never even considered for mass production. Too weird to live and too rare to die.—Hunter S. Thompson
from Fear And Loathing In Las Vegas
No PE stamp required if beam schedules in the WI Build COde is followed. Trusses come with drawings, as do the floor system, as did the T-mass foundation system, and as will the SIPs used for the walls. This is rural WI, not NYC
The "transcribing fee" was $400 and is returned as a credit towards materials.
Your talking to the porch and interior wall subcontractor, so I will not upcharge for the change.
The mechanical contractors are very pleased with how I've involved/considered them in the design process.
I was getting worried about the detail into which I wanted to go with everyone and I tread carefully not wanting to not accept advice that is from the experienced mouth. I am pleased to say that - unless they are all blowing smoke up my a$$ - that the lumberyard owner, builder, draftsman, SIP quoter, truss designer, plumber, mason, and HVAC person have told me that it is nice to work with someone that has put so much thought into things.
It probably helps that I am trying to doing things in a simple and efficient manner.
Regarding my comment about the criticism and your reply - often, tone is lost in the typed word and/or we talk to people online without the courtesy we'd give someone we meet in line at the grocery store. I try to be sensitive to that and I ask the same of others. A simple "how about" or "have you considered" or a simple complement given ahead of a piece of criticism really helps to lubricate the wheels of discourse. There is always the troll looking for an arguement, but I start with the presumption otherwise.
Update today - fun with permits. . .
http://jhausch.blogspot.comAdventures in Home BuildingAn online journal covering the preparation and construction of our new home.
Keep the posts coming, I find it interesting.
Doug
Thanks - Things may be a little slow for the next month though.
http://jhausch.blogspot.comAdventures in Home BuildingAn online journal covering the preparation and construction of our new home.
Finally - some progress!
I've posted pics of the loft interior and now we know that the house will be burned by the vfd on 6/28. As posted in the blog, we hope to have footings started the week of 7/10
I am interested in comments about the loft. . .
http://jhausch.blogspot.comAdventures in Home BuildingAn online journal covering the preparation and construction of our new home.
Have you looked lately? Ever try and post a comment?
Setting forms for the walls tomorrow.
http://jhausch.blogspot.comAdventures in Home BuildingAn online journal covering the preparation and construction of our new home.
nice site , j......very enjoyable viewingMike Smith Rhode Island : Design / Build / Repair / Restore
Thanks. It's been pretty easy to keep current. It is definitely easier to keep friends and family "up to date" this way rather than picture-filled emails.
I need to get some pics of the foundation now that the forms are off.
Backfill late this week - floor system should arrive any day. . . .
http://jhausch.blogspot.comAdventures in Home BuildingAn online journal covering the preparation and construction of our new home.
Updated today with a post for the Porch Piers. (DIY masonry hacking at it's finest!)
Backfill today if the weather holds.
http://jhausch.blogspot.comAdventures in Home BuildingAn online journal covering the preparation and construction of our new home.
Edited 7/24/2006 2:34 pm by jhausch
The blog was updated today with pics of the floor system going in.
We should be setting some of the first floor SIP walls by Tuesday or Wednesday.
http://jhausch.blogspot.comAdventures in Home BuildingAn online journal covering the preparation and construction of our new home.
Updated the blog this morning with pics of the SIP walls going up.I worked with the two man crew yesterday and we had a blast. Sorry that I can't be there today, too; but gotta go to the job that pays the bills. . . .
The SIPs they are standing up today are almost 18' tall.
Should be ready for trusses by the middle of next week.
http://jhausch.blogspot.comAdventures in Home BuildingAn online journal covering the preparation and construction of our new home.
The big window wall for the great room is up.
Going to tackle some interior walls this weekend - maybe even a bit of the second floor deck (maybe. . .)
http://jhausch.blogspot.comAdventures in Home BuildingAn online journal covering the preparation and construction of our new home.
Well, we didn't make it to the 2nd floor deck, but we did make some progress on the first floor interior walls.
With any luck we'll be ready for trusses in a week.
http://jhausch.blogspot.comAdventures in Home BuildingAn online journal covering the preparation and construction of our new home.
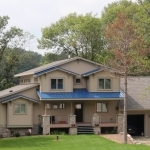
Second Floor Deck and Walls are Up.
I also added a link to a Jobsite Webcam (which is pretty boring now that the walls are up - It's wireless, so I will move it inside - when the roof is on - to see if it can reach the router from there.
The picture here is from the garage side. (The garage will be conventionally framed). There are 3 windows that will go in the upper-right of that wall, but until they get cut in this view looks like the hillbilly Borg ship. (The door is not fully cut out yet so that makes the wall look even more massive.)
http://jhausch.blogspot.comAdventures in Home BuildingAn online journal covering the preparation and construction of our new home.
Tried to do this as an Edit to the last post, but it would not take.
I put the webcam on restricted access. The builder was not comfortable with it out there for the whole world to see. I may open it back up weekends. The last thing I want to do is make him reluctant about being on my jobsite.
I will continue to keep the blog up to date.
http://jhausch.blogspot.comAdventures in Home BuildingAn online journal covering the preparation and construction of our new home.
Finished (for the most part) the rest of the interior walls.
http://jhausch.blogspot.comAdventures in Home BuildingAn online journal covering the preparation and construction of our new home.
Trusses
http://jhausch.blogspot.comAdventures in Home BuildingAn online journal covering the preparation and construction of our new home.
Gable ends, Rough Stairs, HVAC rough in started today.
http://jhausch.blogspot.comAdventures in Home BuildingAn online journal covering the preparation and construction of our new home.
Not a lot of exciting things happening. HVAC and Plumbing rough are in. Slab prep is done.
Sorry there have not been more updates - nothing dramatic to show off.
Frankly, I am not overjoyed at the HVAC guys or plumbers. I try to be very clear and account for as much as I can, but it is hard to catch it all.
I sometimes feel like the sophomoric and whine-ey home owner nit-picking things I don't fully understand. The other part of it is that I am getting what I pay for. I don't want to pay huge dollars for gold plated work. I want my plumbing and HVAC to meet code and not leak. Would I have preferred a home run PEX system and more care taken at the install? Would I like to see less flex duct and more metal? Yes. Do I want to pay for it? I guess not. . . .
If you want to see some pics/hear a story or two of what I'm talking about, let me know and I'll post them.
http://jhausch.blogspot.comAdventures in Home BuildingAn online journal covering the preparation and construction of our new home.
Two new posts -
An updateandHow to install receptacles in SIP walls
http://jhausch.blogspot.comAdventures in Home BuildingAn online journal covering the preparation and construction of our new home.
Jim,
Looking good! You're still making pretty darned good progress , despite the weather. Good luck.
Jon B.
Thanks.
I can't wait to see the rest of the windows go in.
In the meantime, I'll be a wiring pulling fool for the next week or so.
http://jhausch.blogspot.comAdventures in Home BuildingAn online journal covering the preparation and construction of our new home.
Jim,
Just curious, how much of the building are you doing yourself? I know you've been planning this project for quite some time
With a F/T job, I can't fathom how you could have enough free time to do much with out a lot of assistance. You are still at the same job, no?
Jon B.
I have a builder. He was recommended to me by the SIP supplier. Small 2.5 man operation from Theresa. He gave me a full bid. He said, "do what you want and I'll do the rest". I am keeping track of my hours when doing things that were in his bid and he's going to "pay" me for my time - as long as nothing has to be re-done. I am very conservative when recording my time because I know something that takes me 4 hours would take him 2 or 3.
His first draw was almost half of his bid, so he knows he'll come out OK on this.
He is not marking up any materials, but he is giving me the invoices straight from the lumber yard. Who knows if he's making anything from the lumber yard, but the prices have been fine.
I have pretty much GC'd the project and worked evenings and weekends to keep things moving along. I scheduled and hired the Excavator, Mason, HVAC guy, Plumber, and Electrician.
The builder did the sills, beams, floor decks, walls and roof. The wife and I framed the interior walls, built the block porch piers, and now I am a wire pulling fool. I will probably take tomorrow off to work with the electrician for a full day to make sure I am still on track.
The builder will continue on the outside as we keep flailing away inside.
As you mentioned, I've been thinking about this for so long and have thought through so much. The lumber yard, the builder, the guy who took my pencil drawings to CAD, the mason, the plumber, and the electrician have all commented that "I really know my stuff" - my reply is, "I really know this project - beyond this I would be a hindrance and not a help." (The HVAC guy thinks everyone is an idiot and his $hit is gold plated - but he's pretty much the show out here and his prices are fair)
There are some things that I've done that I need to fix, there are some things that others have done that I may "fix". All in all, it's going OK.
Yes, I am still at the same job. I am glad I have a job that allows me to easily take a day here and there to be on site; or where I can end or start my day to allow me to meet with someone starting there. Living on-site (in the garage apartment) has helped with that, too.
http://jhausch.blogspot.comAdventures in Home BuildingAn online journal covering the preparation and construction of our new home.
Siding is well underway.
Using PVC trim that we pre-painted. Making brackets and sills from cedar (which we'll prime and prepaint before installing)
http://jhausch.blogspot.comAdventures in Home BuildingAn online journal covering the preparation and construction of our new home.
Passed the Inspection for Rough Framing and Mechancials (Electrical, Plumbing, and HVAC)
Used TigerFoam DIY foam kits on the cantilevered bumpouts. Effective, but MESSY!
http://jhausch.blogspot.comAdventures in Home BuildingAn online journal covering the preparation and construction of our new home.
Blog update!
Natural Stone Retaining Walls - pics went up today.
Interior drywall pics should be up by tomorrow.
http://jhausch.blogspot.comAdventures in Home BuildingAn online journal covering the preparation and construction of our new home.
Looks good!
Regarding the Tigerfoam, would yoiu recommend using that product for spraying the perimeter rim joist? My perimeter is about 220'. I also have a cantilevered area about 204 sq ft that could be sprayed.
I also used SIPs for my walls and like your idea of the router template, the SIPs guys i used said to just plunge cut the RO for the box with a skillsaw.
It would be perfect for the rim joist. That is a very common application and the only one where my local inspectors will allow exposed foam in the basement. It is hard to remember, but when starting with full tanks, don't pull the gun trigger all the way. The foam tends to blow itself out of the way. Also, the cone tip works better than the fan tip (in my opinion).
On my house we used a SIP rim. IT is 11-7/8" and is set up to straddle 2x4's (vs 2x6s on the main walls. My basement walls are 10" thick (Thermomass system: 4" concrete, 2" foam, 4" concrete), but even on an 8" basement wall you'll still have enough bearing surface for the I-joists.
If you look back in my archives you can see the SIP rim pics. Look in the July time frame.
http://jhausch.blogspot.comAdventures in Home BuildingAn online journal covering the preparation and construction of our new home.
The beginning of some interior shots have been added.
http://jhausch.blogspot.comAdventures in Home BuildingAn online journal covering the preparation and construction of our new home.
Great Room Box Beams - very cool (IMHO ;-)
Based on the FHB box beam article and the feedback I read here, I made one set of beams smaller and slightly higher than the others.
I still went with the lights, but used IC enclosures for them that are also rated junction boxes.
You can also make out the window trim design - not traditional, not modern, but a contemporary take on A&C maybe (?) missing some details, but still what I think is good looking.
http://jhausch.blogspot.comAdventures in Home BuildingAn online journal covering the preparation and construction of our new home.
Looks really nice. I like those stepped windows- you should put up some detail shots of the windows and trim.
From what I can see, it looks like A+C. Not the fancy stuff, but the more common, simple lines of butt joints and lots of reveals.zak
"When we build, let us think that we build forever. Let it not be for present delight nor for present use alone." --John Ruskin
"so it goes"
Thanks, that is the look I am going for - "contemporary craftsman". I'll post some detail pics soon.
As mentioned, it's all MDF. The Head is a 1x6; the side casing is around 9/16 x 3-1/2; the base is a 1/2 by 5-1/5; and theres a stubby plinth at the bottom of the casing. You are right, it is "simple" - no back banding or that "cockbeading" at the inside line of the casing.
The "sill" is a piece added to the extension jamb and the apron is a ripped piece of casing.
To a purist I am sure it looks terrible; to me, it gives me the look we wanted.
http://jhausch.blogspot.comAdventures in Home BuildingAn online journal covering the preparation and construction of our new home.
Nice project you have going on! Few questions on the Tiger Foam,
Were getting near to using the same type of product. Would like to foam about 1100 sq of 9'wall & the rim area under the Tji floor system. Not sure how thick we will go just yet. Also looking at the 600+bf size. We can get it for about $640 each. Is it Ez to spray? Any tips for a 1st time user? Was the coverage equal to what they state?
Thanks for any information!
For best yield, keep the tanks at the indicated temperature (btw 65 and 75 IIRC).
The round tip worked better for me than the fan tip. Your Mileage May Vary
Don't pull the trigger all the way when the cans are full, the pressure is so great it will blow the foam out of the way. . .
Multiple coats are best.
The 640 system is about 600 board feet (1" x 1" x 12"). I think you get R5 or R7 per inch. I am guessing that you'll need 2 or 3 of the 600bf kits at least . . .
Be prepped and ready to do it all at once (masking plastic in place where needed, ladders ready, etc) . Have a helper as your tank mover. Get the goggles and tyvek suit. Since I was spraying overhead, the goggles got pretty bad very quickly. Tape the tyvek suit to your gloves or you will be "de-hairing" your wrists.
For either application, remember that you can put in an 1inch or 2 of foam, then use batts to get to your desired R-value.
Also, call the number on the fomofoam site. I think the guy that answers that will tell you to order on tiger foam and he'll give you a discount code.
Good luck.
http://jhausch.blogspot.comAdventures in Home BuildingAn online journal covering the preparation and construction of our new home.
Thank you for the Info!
Happy Holidays!
After a long delay caused by my real job, I'm starting to post pics again.
We're in, but far from done. . . .
http://jhausch.blogspot.comAdventures in Home BuildingAn online journal covering the preparation and construction of our new home.
Edited 3/6/2007 9:47 pm by jhausch
More Pics just posted.
http://jhausch.blogspot.comAdventures in Home BuildingAn online journal covering the preparation and construction of our new home.
Mike I am a neighbor of a sister to The ludwigs that you built for in R,I, I have been trying to get the article you wrote about the project in here. I am a builder here in Maine, and Deb has told me of some of the problems her Brother has had with the neighbors. Please direct me to the article you wrote,
Thanks Frank Morello.
http://forums.taunton.com/n/mb/message.asp?webtag=tp-breaktime&msg=67972.1
hi , frank... i saw your post earlier but i was rushing out the door...
i see bill has obliged..
let me know if you have trouble finding it
( ## Adverse Conditions ## )
Mike Smith Rhode Island : Design / Build / Repair / Restore
Here's one way to save on dumpster space! (see blog)
The excavator will be here today or on the 5th. In either case, the mason wants to layout footings the week of 7/10. Feels good to be making progress.
By the way, Cloud, my T-mass stuff shows up today!
Adventures in Home Building
An online journal covering the preparation and construction of our new home.
Edited 6/29/2006 7:21 am by jhausch
Not sure if I needed to do a reply to ALL. Just want to make sure that those who are "subscribed" to this know about the update. . . .
http://jhausch.blogspot.comAdventures in Home BuildingAn online journal covering the preparation and construction of our new home.
Edited 6/29/2006 7:34 am by jhausch
Don't make no difference.Shows up as unread in any case.
Foundation walls are up - stripping forms tomorrow!
Adventures in Home Building
An online journal covering the preparation and construction of our new home.
A new post! (at the blog link below)
We got the front steps in.
There was a lot of careful layout, but they turned out well.
They are hanging from the block pillars with 3/8" lags and lag sheilds. The bottom tread, because it cantilevers out a bit, is also held with some 2x2x1/8 angle.
Adventures in Home Building
An online journal covering the preparation and construction of our new home.
New post on the blog - natural Stone Thin Veneer applied to one of the front porch columns
http://jhausch.blogspot.comAdventures in Home BuildingAn online journal covering the preparation and construction of our new home.
It has been a while since any updates, but I just finished the largest part of the stone veneer work. I posted 2 pics to the blog (linked below)
We remain far from done, but placing the last stone on this wall sure felt good. We've just been picking off the projects one-by-one, but not letting these projects take all of our available time.
For the benefit of others: If you want the "dry stack" look, used cultured (fake) stone, not real "natural thin veneer". Cultured stone has square edges and consistent sized. I have to cut or grind 80% of the stones I handle.
Adventures in Home Building
An online journal covering the preparation and construction of our new home.
Been a while since I've done any updates on here or the blog.
Stone work is done - just added a few more pics to the blog (link below).
Almost made it through the whole stone process un-injured. I managed to give myself a cut worthy of 3 stitches in my left index finger on Saturday. The finger feels fine. My shoulder is killing me from the Tetanus shot.
Adventures in Home Building
An online journal covering the preparation and construction of our new home.
Just added some pics to the blog: front porch rough construction and a SketchUp concept of adding a gable to the porch roof.
Adventures in Home Building
An online journal covering the preparation and construction of our new home.
When did you get the CO on the house?
Maybe Feb of 07? I'm terrible with dates so I don't recall exactly - could have been Feb '06 - I think this will be our 3rd Xmas so '06 is probably right.
Why do you ask?
http://jhausch.blogspot.comAdventures in Home BuildingAn online journal covering the preparation and construction of our new home.
A few reasons. I was wondering if it was a permitted job and I was also wondering what the build time was.
And the alterative motives:
Here, those front steps wouldn't have passed inspection - open risers are not allowed. Some areas still don't have building inspectors and permits, if any might just be giving the local government some money. BTW - I don't see the open risers as an issue since the steps aren't very high.
Secondly, that sounds like a very unique arrangement you had with the builder - him allowing you to do more or less whatever you wanted on the construction process and them getting "reimbursed" for hours put in. You need to be very thankful for that. I don't think most builders would agree to that as there could definitely be some resulting problems and the builder could be left waiting for significant periods of time for his money. Also, in the new home construction industry I work in people are paid by what they produce - not by the hour. There are very few people paid by the hour. OK - bottom end workers are sometimes paid by the hour, but you were acting more as a subcontractor. Also it would seem very hard for the builder to run a reasonably tight schedule with an unknown like owner labor on site. I have had trouble having home buyers do work on their home. One brief example - drywall repairs resulting from me allowing them to install low voltage wiring. Sounds like you really held up your end of the bargain though, and the build time was reasonable. Owner builder projects can go on for years and years - which amuses me as I see it as in no way professional and I hate unfinished projects - although yours wasn't really an owner builder arrangement, but it does sound like you all did a significant portion of the work and coordinated the job. Looks great and congas to you. BTW - that stone work looks really nice.
Wow, first of all: Thanks for reading the blog. It sounds like you gave it a pretty thorough review. I did the blog to keep family (all in other states) up to date on what I was doing, and, at the time, I was pretty active here on BT. As you saw, the pace of projects has slowed significantly, but it is still nice to hit it with an update now and then and see if it attracts any new eyes.
I was wondering if it was a permitted job and I was also wondering what the build time was.
Yes, but barely. The year I started was the first year the state required that all towns have BI's. Many rural areas satisfied this requirement by subcontracting to local firms. During my build I had 3 inspectors "rotate through". First guy had a background in concrete work, second guy was his boss, third guy was a new guy and I don't really know what his background was. As it got closer to the end, I asked the BI about what I needed to finish up and get my CO. He gave me his "checklist" and said meet these requirements and you'll be good to go. For the most part, that final list was safety stuff and he accepted the fact that the railings were not on the decks yet.
Here, those front steps wouldn't have passed inspection - open risers are not allowed.
WI code for open risers is the "4 inch sphere" rule. It may not be apparent, but the rise is 6" and the steps are 2" thick so I meet that rule. The nosing is only 1" so that makes the step look a bit thinner than it is. My bigger issue is probably no handrail (yet) and the horizontal cables are there yet either.
Some areas still don't have building inspectors and permits, if any might just be giving the local government some money.
I had to get a land use permit from the county, some special approvals due to being a lake lot, and the building permit from my town. Both had their own interesting challenges. While I am in a neighborhood of about 100 homes, there is no official HOA so I did not have to deal with one of those (one of the things that attracted us)
Secondly, that sounds like a very unique arrangement you had with the builder - him allowing you to do more or less whatever you wanted on the construction process and them getting "reimbursed" for hours put in. You need to be very thankful for that. I don't think most builders would agree to that as there could definitely be some resulting problems and the builder could be left waiting for significant periods of time for his money. Also, in the new home construction industry I work in people are paid by what they produce - not by the hour. There are very few people paid by the hour. OK - bottom end workers are sometimes paid by the hour, but you were acting more as a subcontractor.
I was very lucky to find the builder I did. He was casually recommended by the SIP mfr. Really just a 2 man operation, him and his helper. While the blog post sort of indicated that him reimbursing me was the plan, it did not really work out that way. He had his original quote and it was largely based on the things I said I would do vs what he would do. I managed the draws through the title co and was timely in my payments to him. I did keep track of some hours, but it never really amounted to a strict accounting of "your quote was X, I did Y, so you'll be paid Z. He got the money he was looking for. The cost of the house came in where expected. I know we were lucky that it worked out as well as it did.
Also it would seem very hard for the builder to run a reasonably tight schedule with an unknown like owner labor on site. I have had trouble having home buyers do work on their home. One brief example - drywall repairs resulting from me allowing them to install low voltage wiring. Sounds like you really held up your end of the bargain though, and the build time was reasonable.
I was pretty thorough on the scheduling and was committed to not being the guy slowing things down. There were some late nights and long weekends to not be that guy, but we made it happen.
The wife was a real trooper. I have some fond memories of her and I building the interior walls and doing the hardwood flooring and some not-so-fond memories of her toting pails of 3/4 stone to pour around the footings for the porch columns so I was not laying block standing in 8" of muck.
(Side comment, one neighbor asked how I got her to work so hard. My response: make her live in a 750sf cottage with me and 2 dogs for 4 years)
My high-tech scheduling tool was a hand-drawn calendar with one month per row and tiny color-coded post it notes. The notes listed the starts and stops of various tasks of the subs and myself.
The builder told me of the dates he would not be available (one long weekend for a Nascar race and gun-deer season). Those were entered on the calendar with marker (i.e., not on post-its) and when a task did start, the "start" post-it was pulled and the task was written in. The post-its allowed me to adjust tasks as needed, but when something started, it was started. This also allowed me to talk to the subs about who could/would work around whom and who needed to before or after another for logistical reasons.
Owner builder projects can go on for years and years.
Sadly, this one is no different - did you see how grey those 4 cantilevered porch rafters had gotten? The cable rails are stilll not done. I am missing some exterior light fixtures I have yet to make. There still is some unpainted trim work inside. etc etc.
I guess, however, for the subs, they were all able to do their jobs in entirety and be paid in a timely fashion. I am the one that has to live with the honey-do list. The hard part is keeping it from growing!
- which amuses me as I see it as in no way professional and I hate unfinished projects -
As a pro, I'd expect you to feel that way. As the home-owner, well, I have no one to blame but the GC :)
I don't like the un finished work either. I feel bad that my neighbors had to look at those unfinished columns and porch roof for so long. I suppose it's all relative, though. One neighbor has 4 cars sitting in the weeds. . .This area is sort of a combination of rural / distant sub-urban / and lake living. As such, there is a mix of old cottages (like what we lived in then burned down to make room for the new house), new homes, and projects in various states of completion.
although yours wasn't really an owner builder arrangement, but it does sound like you all did a significant portion of the work and coordinated the job. Looks great and congrats to you.
Like you said, I guess I was more or less the project manager/GC and got really lucky that most of the subs were willing to work with me. I also think seeing the detached garage/apartment and my general approach to things gave the builder enough confidence to dive in.
BTW - that stone work looks really nice.
Thanks. Masonry was totally new to me. A guy I work with who did block/stone work in college was a big source of guidance and help.
Once again. Thanks for checking out the blog and posting comments here. I think I know where you, as a pro, are coming from. I know this situation was unique and would not work for everyone.
http://jhausch.blogspot.comAdventures in Home BuildingAn online journal covering the preparation and construction of our new home.
Re the scheduling, I do it all in my head and using a pen and paper calandar. I used MS Project for two builds: A 1/2 mil house and an apartment complex. It was usefull, however really it just added work - night work that I did for free... I felt M/S project was way too powerfull for what I needed. The boss loved it though.
I'd like to find more of a cheap, quick and dirty scheduler that I can just set up a calandar, with sequenced (interdependant tasks) that I can adjust one task when a sub doesn't show up on time or something unexpected comes up, and have all the future tasks atuomatically rescheduled for later dates. Outputs would be in the form of a regular calandar and a gantt chart.
Anyone?
I see what you are getting at. I think an Excel / VB wiz could probably put something like that together. Perhaps a local community college professor could do it on the side or make it a class project?
I am picturing a SW where tasks can be entered and then declared as dependent on other tasks. Maybe further classification if the task can be done in parallel with other tasks or not.
Adventures in Home Building
An online journal covering the preparation and construction of our new home.
Added a couple of pictures of Cable Rail to the blog
http://jhausch.blogspot.com/2010/09/cable-rail.html
I also don't recall if I posted the pictures of the metal roofing on the porch
http://jhausch.blogspot.com/2010_08_01_archive.html
It will be interesting to see if anyone is still subscribing to this old thread.
Signed
Jim the Necroposter.
I'm going to have to refresh my memory of the place.
Thanks for coming back with a report.
You're welcome
Thanks for looking. I'm surprised the DIY cable rail has not triggered more interest.
Thanks again for "flat mode". Much better.
Canine Refreshment Station (or, for WI, the "Dog Bubbler")
Forgive the Necroposting.
If this should be in it's own thread, let me know and I'll post it.
Just updated the blog with a picture of a "fun project". I'll let the grout cure for a few more days then I'll seal it (which should give it some shine like the main countertop)
There is a video on the blog, too.
http://jhausch.blogspot.com/2011/01/canine-refreshment-station.html
-Jim
At first I thought, "Here
At first I thought, "Here goes another Googler resurrecting a four year old thread". (We've had a lot of it lately)
...then I saw you're the OP! And it's your house...so I'd say you are certainly qualified to resurrect it.
Very nice work.
And the "Canine Refreshment Station" is über cool. Can't say I've ever seen that before. Thumbs up.
Hey - I said I was Necroposting :)
It sounds like the forum is visible to Google. From what you are saying, are folks resurrecting threads because they stumble in here on a search? That's always interesting.
As noted on the post above, I feel "obligated" to update this old thread. I feel like a Breaktime graduate and these are my alumni contributions :)
Glad you like the latest project. It was a fun one.
They stumble in here to post spam.
>>>It sounds like the forum
>>>It sounds like the forum is visible to Google.
It is now. One of the rather interesting pieces of "rationale" that Taunton used to foist the new forum software on us.
Me, I'm getting used to it and can even see some advantages.
But there's no denying that the transition process was a textbook case of how not to communicate, introduce change, and build a sense of community.
You and I conversed about this project a while back..........
at least I'm thinking as an email address pops up with your name on it. It must have been a while ago as I'm foggy on what it was about.........................
You are doing a real nice job, way to go!
Thanks
I don't visit the Taunton sites much anymore, but I feel obligated to post updates here whenever I do anything interesting on the house.
This place - and Taunton in general - were a big inspiration before and during construction. I get the FHB and FWW emails and pop in here every now and then. I'll buy FHB or FWW on the newsstand every now and then. I'm thinking about re-upping one of them.
I hang out on a few general aviation sites a bit more these days because I hope our next big purchase will be a small airplane. I've had my pilot's license since 1994, but stopped flying regularly in 2000
The funny thing is that prior to that adventure (an airplane), there will probably be another house so maybe I will start hanging out here again. . . We love this house, but the long commute is bit of a drag. The next place (if we move) will be a down-size into a more urban area. I'm toying with the idea of an infill teardown so we could build something energy efficient and unique, a la SS NSBH.
Great to hear from you, Calvin. I hope all is well in NW OH.
J, yessir..........NW Oh. is alive and continuing to struggle...
But we are doing ok. Work ended slow for 2010, and starts like last year, full into spring. The indecision of the near future is something I've dealt with for a long time. Only now many of our friends and customers are experiencing the same thing. I don't know how it will shake out, but am confident that my reputation will carry me through as it's done for the last couple here in the shadow of the motor city.
A beautiful passive solar day today, hope you have the same.
Necropost alert...
Looks like the place has sold. Closing in early August. Going to try urban living for a while...Milwaukee neighborhood known as Bay View.
No doubt projects in the new house (once we find it) will bring me back here for advise and such...
Forum question...
Tried to edit profile information. Was able to delete my old signature, but could not find where to change things like age, personal quote, etc..
I think the ability to do that stuff was lost in the massacre.