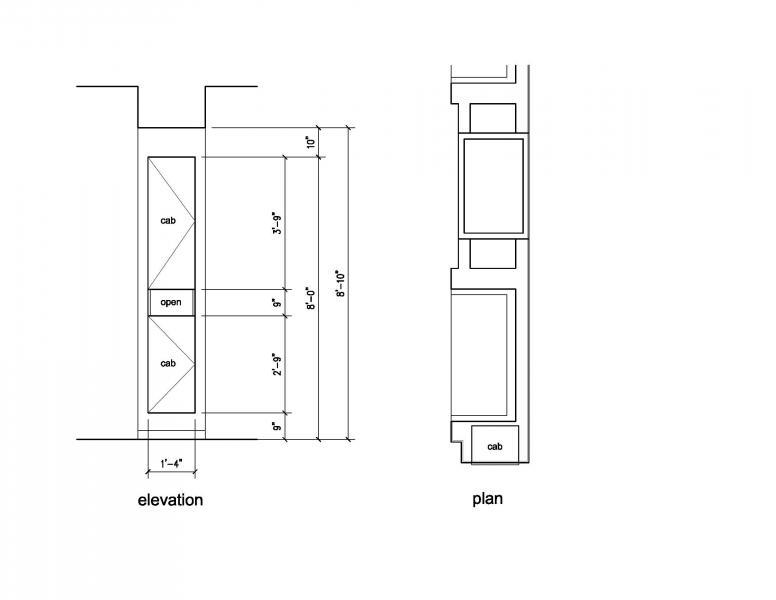
I want to put a cabinet in a thickened wall (furred out wall). My question is about your experience with setting the cabinet flush with the drywall or is it always best to have the cabinet door sit outside the plane of the drywall. Modern, simple flat panel doors, going in a plain dywall (textured painted wall). While detailing it I realized that I may be adding a lot of drywall work if I attempt to make the door flush out with the drywall. Some simple face frame is okay with me if it is better practice.


Replies
Built-ins are one of my specialties and I'd say I like either and would suggest doing what style you like the looks of. Having a cabinet flush with drywall is pretty easy with new construction and only slightly more involved as a retrofit, unless the drywall is crazy and not all on the same plane as your cabinet faces, which isn't uncommon. That assumes you are decent with texture touchups. With this method you'd be lucky to install the cabinet, tape & texture, and touchup the paint in less than 3 hours.
When flushing a cabinet I like to add an additional plywood rip along the entire perimeter of the cabinet that is about 1/16" shy of the cabinet face so it's easier to tape over this flange and smooth your mud to the face and not have to extend over the actual face of the wood. Same for flush mounted door jambs or window jambs.
Another option is to recess the face of the cabinet slightly in the drywall using bullnose to create a nice looking detail around the outer edge - of course your hinges will have to work with this. Essentially a second plywood rip rings the outer edge of the cabinet and there is either a kerf in this layer or between the two layers and one side of the bullnose drywall corner fits nicely into it. After everything is taped and textured and primed, the slight gap between the edge of the kerf and drywall corner bead is caulked to get rid of any small gap. This method works really well with more contemporary homes that already have a lot of bullnose corner bead.
Of course Shadow boxes can be put around any built-in to make them visually more interesting, and trim and door selection has an unlimited number of options as well.
For most average installs and average budgets be better off with a face frame that extends over the drywall cutout a good 3/4". Cut the hole in the sheetrock 1/4" wider and taller than cabinet dimentions, add blocking all along the edge of the cutout - I typically use 3/4" ply rips as tall and deep as I can make fit since this is what the cabinet will attach to. If everything goes smoothly it may only take 30 minutes to layout, cut the hole, install, caulk, fill nail holes, vacuum and load up your tools.
Personally, the builtins that I really enjoy look like pieces of furniture that have simply been swallowed up by the wall.
Cheers
I would say the wall and the nook have to be finished perfectly so the reveal between the wall and the cab door is even all around. Leave 1/8" space all around the cabinet body and face edge can be refinished with a veneer. There is a latch that springs the door open by pushing on the door so that it can look as flush without the door knob. If the nook is not deep enough, back of the cabinet can be cut and new backing put on. There should be blocking in the back wall for hanging the cabinet, but it can be hung from the side walls too.
by
Corner bead would have to be perfect--- "L-bead" would give you a chance to lay it up to the cab. sides and finish perfectly-
if
the cab doors are out into the room with the box near flush to the face of the drywall.